Pecan Chews with Small Batch Bourbon

Season’s Greetings! Feliz Navidad! Merry Yule! Joyeux Noël!

Whatever it is you are celebrating this winter, I’m pretty sure it is an occasion where family and friends and cookies are involved.

Pecan Chews with Small Batch Bourbon~ Erin's DC Kitchen

I love doing traditional Christmas cookies this time of year. I’ve already posted some of my family favorites which I make literally every year, here and here and here. Um, what is there not to love about adorable little holly wreaths laced with marshmallow creme? Or buttery, flakey little cookies sandwiched with a whipped frosting tinted holiday colors? Nothing, that’s what.

But, my dear husband requested something “new and interesting”. I promptly informed him I would be making the traditional cookies as I always do, but suggested he pick out a recipe or two from my Martha Stewart Holiday Cookies special issue magazine and I would make it for him.

Pecan Chews with Small Batch Bourbon~ Erin's DC Kitchen

He zeroed in on these delightfully chewy, nutty and very grown-up cookies. These drop cookies come with an extra boost of holiday cheer from a key ingredient– small-batch bourbon. Not only are they yums, but small scale distilleries are all the rage right now (God, is that saying even used anymore? Apparently yes, and by me) so these cookies are a perfect gift for the boozy trendsetter in your life.

Okay, to the recipe!

Pecan Chews with Small Batch Bourbon

  • 2 cups flour
  • 1 tsp salt
  • scant 1/4 tsp each cinnamon, nutmeg and cloves
  • 1/2 cup butter, soft
  • 3/4 cup molasses
  • 1/4 cup small batch bourbon, we used Four Roses
  • 1 cup packed light brown sugar
  • 3 cups coarsely chopped toasted pecans*

Combine flour, salt, spices and 1 cup of the chopped pecans in a bowl, set aside. In a small saucepan, warm the molasses and butter over low heat, stirring often until the butter is melted and mixture is smooth. Remove from heat and let cool, then stir in the bourbon. I highly recommend not adding the bourbon when the mixture is too hot, it is will immediately cook off the alcohol. Take your time to let it cool, and you will be rewarded with a finished product that actually tastes a little boozy. 🙂

Next, whisk the brown sugar into the molasses-bourbon mixture and stir until sugar is dissolved.  Stir the liquid mixture into the dry ingredients and chill the dough for 1 hour or more. The dough needs to be nicely chilled because it is too soft otherwise which makes rolling the dough into balls difficult.

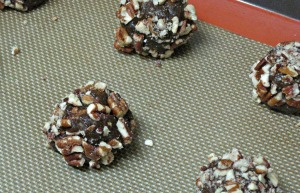
Preheat the oven to 400°. Using a tablespoon size scoop of dough, roll it between your hands to shape a ball, then roll the ball into the remaining 2 cups of chopped pecans. Here is a picture of the pre-baked balls.

Pecan Chews with Small Batch Bourbon

Place on a baking sheet, allowing a little room between the cookies to spread. Bake for 9 to 11 minutes– cookies are done when the edges are browned and they have flattened out. The center may look slightly undone, but it is fine as long as the edges are browned. Remove from oven and let cool for a few minutes on the cookie sheet before removing to a wire rack, as the warm cookies are very floppy. As the cookies cool completely, they will firm up, but still stay deliciously chewy inside.

*Note: To toast pecans, spread whole pecans in a single layer onto a cookie sheet and bake in 350° oven for about 10 minutes. Stir occasionally. Once the nuts smell fragrant, take them out of the oven, the oils in the nuts allow them to scorch quickly.

Recipe adapted from Martha Stewart

Enjoy!

– Erin

Two Time Jam Champion at the State Fair!

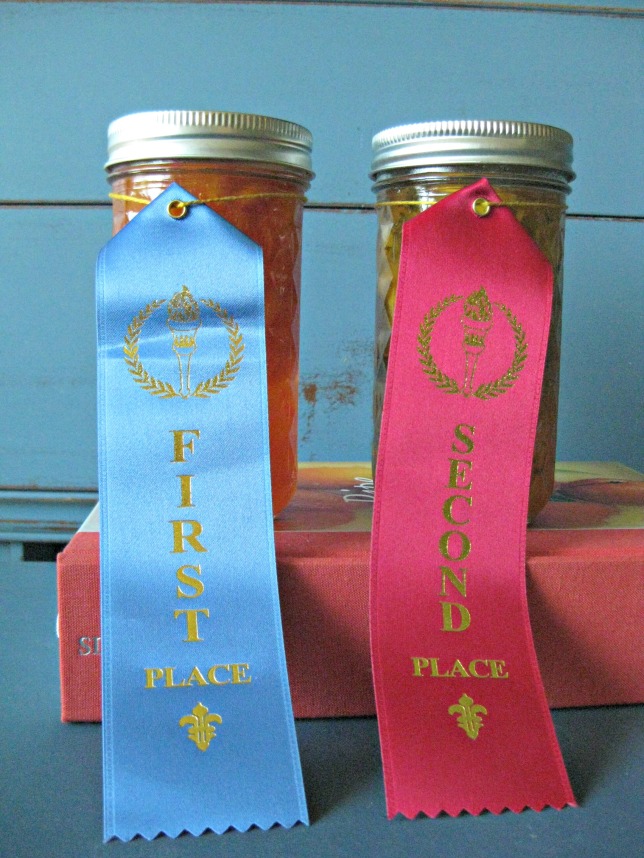
Hi readers! Hopefully the title of this post says it all, but yes, the DC State Fair happened this past weekend and my jam won first place, again! Last year I won first with my Southern Lady Pepper Jelly, and this year I entered two fruit-centric jams. I’m trying to be modest, but both jams placed– 1st and 2nd!

Award Winning Jams ~ Erin's DC Kitchen

I didn’t go into this year’s fair thinking I would win again. There was a lot of good competition last year who I knew would be back this year too. Plus, a part of me felt my win was probably beginners luck last time. Nope! I think I might know what I’m doing! 😉

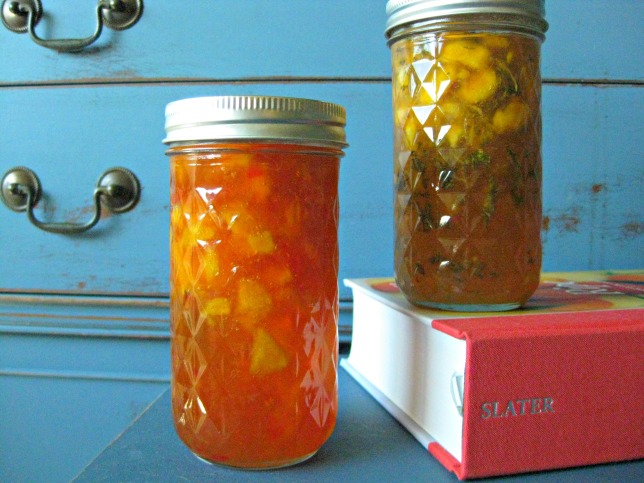
Smoky Peach and Pepper Jam and Peach-Basil Jam ~ Erin's DC Kitchen

So, on the left is the 1st place jam,  Smoky Peach and Pepper. The 2nd place jam on the right is Peach-Basil. These are the peaches my husband and I picked earlier in the summer, and the basil and some of the peppers were grown in my community garden plot.

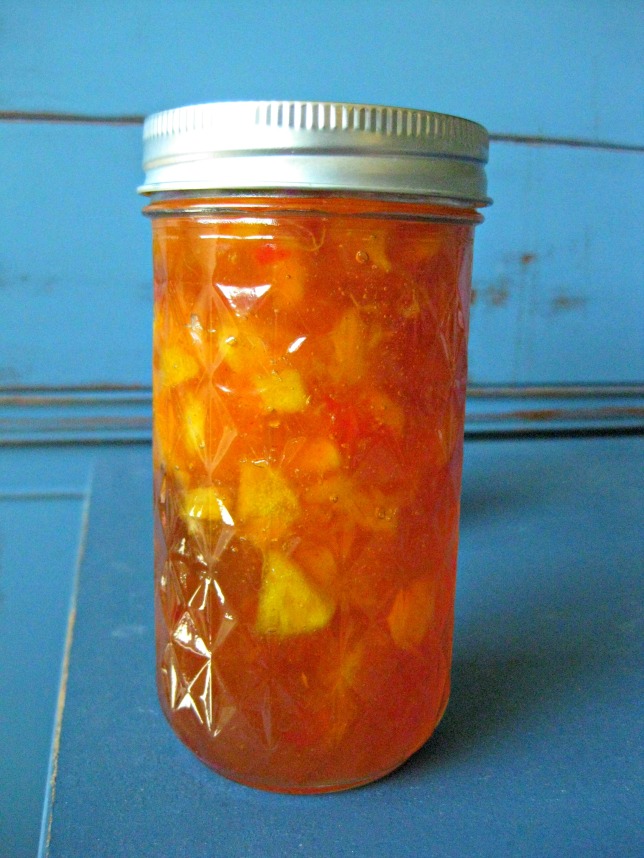
Smoky Peach and Pepper Jam ~ Erin's DC Kitchen

LOVE the color

These jams are delicious and too sophisticated in flavor to go on a PB&J. The Smoky Peach and Pepper has an intense smoke flavor that yields to the sweetness of the peach and a tiny hint of heat from the pepper. It is amazing served with cheese and crackers. The Peach-Basil is also sweet, with a strong fresh basil taste that intensifies as you chew. I love slathering it onto a toasted bagel and cream cheese.

Yums. 🙂

IMG_3853

I’m sharing the recipes with you all in the hopes you try these jams too one day. Freshly picked ingredients make the best jam, remember that! I picked everything that went into this jam and then starting cooking it within 24 hours. It sounds like a lot of work, but it really is just fun and you get a better product.

Fresh Peach Jam

  • 4 heaping cups finely chopped, peeled and pitted peaches
  • 2 tbl lemon juice
  • 5 cups sugar
  • 1 package (49-57 g) powder pectin or about 6 tablespoons

For Peach-Basil Jam

  • 3/4 cup snipped fresh sweet basil

For Smokey Peach and Pepper Jam

  • 3/4 cup finely chopped red, yellow and orange hot peppers (not jalapeno)
  • 1/4 heaping tsp dried smoked paprika (taste it, you may need to add more depending on smokiness of your spice)
  • 1/4 tsp dried ground chipotle pepper (again, taste it, you may want more if you want a big kick of heat, this is for mild heat)

Directions: The base peach jam recipe is above, you add in either the additional ingredients for the Peach-Basil or Smoky Peach and Pepper jam in addition to the base recipe. The measurements for the additional ingredients are for a whole batch (meaning you need to make the base peach recipe twice if you want to make both jam flavors. I do not recommend doubling the recipe and then trying to split it in half.)

Prepare your peaches by scoring an X along the bottom on the skin and dropping the peaches into boiling water for 30 seconds. This will loosen the skin and make it easier to peel. Peel, pit and chop the peaches until you have 4 heaping cups. Add the peaches and lemon juice to a large pot. Stir in the pectin and bring to a boil over high heat. Sit in the sugar all at once. Return to a boil and boil hard for 2 minutes. You will notice the texture of the jam mixture will go from grainy and thick to liquidy. Once it gets liquidy, your almost there but be sure to boil hard for at least two minutes or the jam will be soft. Skim off foam as desired, or plop in a tablespoon of cold butter, which is what I do, to keep the foam down.

*If you are making Peach-Basil jam, stir in the snipped basil right after you skim off the foam. Keep the mixture hot while you are doing this, or else you will get air bubbles in your jam.

*If you are making Smoky Peach and Pepper, add in the chopped peppers along with the peaches at the beginning of the recipe and continue to cook according to instructions. After you skim the foam or add the butter, stir in the dried ground spices. Again, keep the mixture hot while you are doing this, or else you get air bubbles.

Next, ladle the hot jam into cleaned and prepared jars. This should make about 7 eight ounce jars, or the equivalent thereof– I used 12 oz jars because I liked the look. Screw on the lids and the bands, and process in a boiling water canner for 10 minutes. (Start the timer once you’ve put the jars into the canner and the water returns to a full boil).  Remove and let cool. You can turn the jars every few minutes, for the first 20 minutes of cooling, if you want to evenly distribute the fruit. Make sure your lids have sealed and enjoy! The jam is shelf stable for 1 year. Once it has been opened, keep it in the fridge.

Enjoy!

Erin

Erin's DC Kitchen at the State Fair

Fall Round-up: 5 Tastes of the Season (Cinnamon Ice Cream, anyone?)

Happy Fall! This past weekend (Sept. 21st) marked the official start of fall and I’m loving it. The chill in the morning when I walk to the bus stop is the best! 🙂 Plus, I got to bust out the fall boots. I’m not normally one to jump on trend bandwagons, but I have to say I really want some  knee-high cable knit socks to wear under those boots to up the cozy-factor. (Sounds cute right?)

Anyway, I know you don’t come here for fashion commentary. This post is a round-up of fall recipes I’ve put on the blog before, but deserve to get more attention now that I have (slightly) more readers. You newbies might have missed out on these classics!!

For my birthday a couple weekends ago I went apple picking with my in-laws at Stribling Orchard in Virginia. The day was lovely, the apples were plentiful, and the ensuing pie was delicious. I canned four quarts of applesauce, which used up most of the haul, but also made a pie and am working out an apple crumb bar recipe that will hopefully be posted soon!

In the meantime, enjoy the tastes of the season with these 5 recipes!

Homemade Chunky Applesauce

Homemade Chunky Applesauce

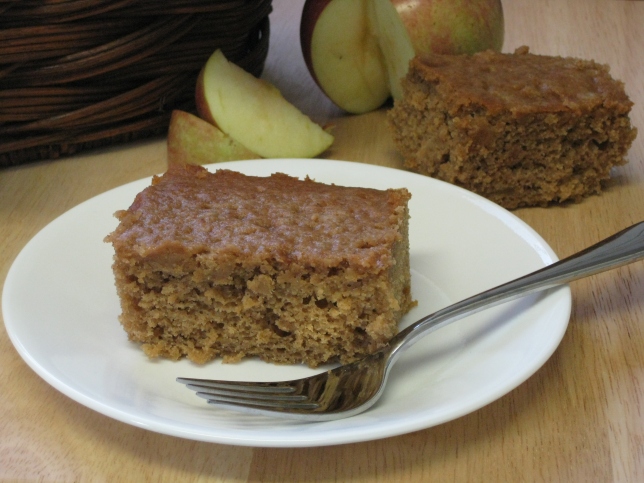
Apple Cider Cake (ridiculously appley)

Apple Cider Cake ~ Erin's DC Kitchen

Cinnamon Ice Cream (what else should go on that pie?!)

Cinnamon Ice Cream~ Erin's DC Kitchen

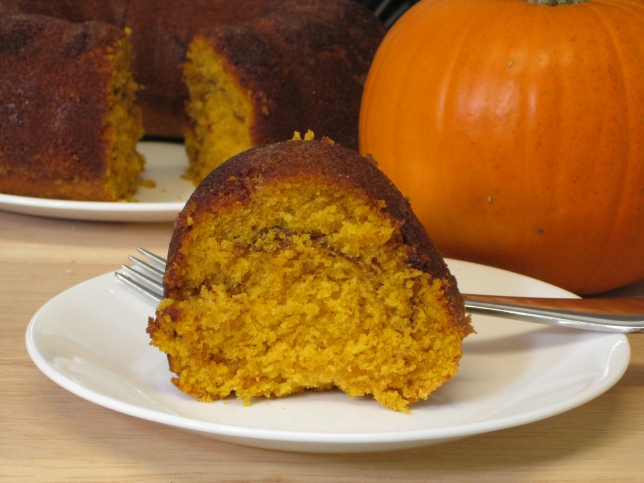
Pumpkin Sour Cream Coffee Cake

Pumpkin Sour Cream Coffee Cake ~ Erin's DC Kitchen

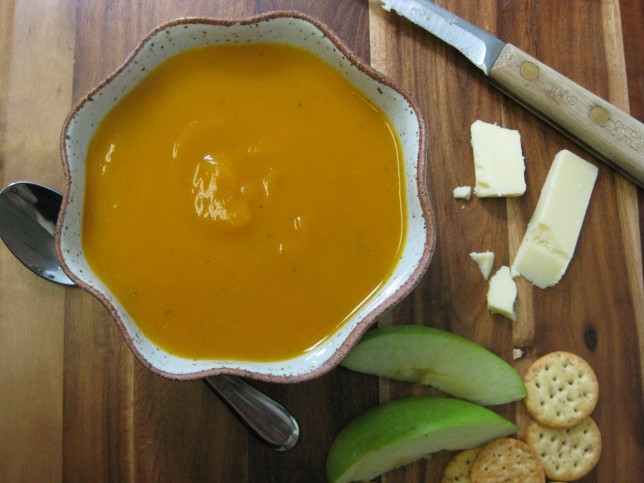
Butternut Squash Soup

Butternut Squash Soup ~ Erin's DC Kitchen

Oh heck, here is a bonus one! Sweet potatoes shouldn’t be forgotten this time of year! 🙂

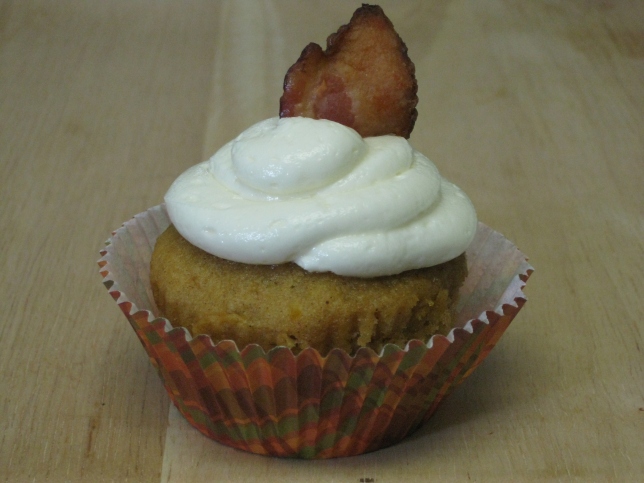
Sweet Potato Cupcakes with Candied Bacon

Sweet Potato Cupcakes with Candied Bacon ~ Erin's DC Kichen

Fresh Peach Cobbler

Hey.

Guess what?

We went peach picking. 🙂

You should know what that means by now, right? Get ready for peach posts.

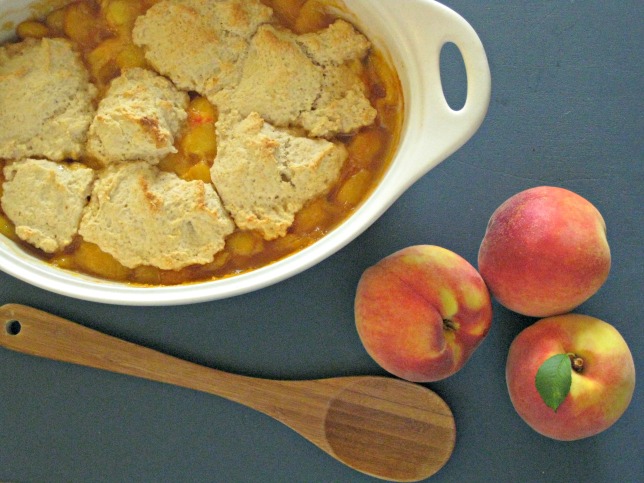
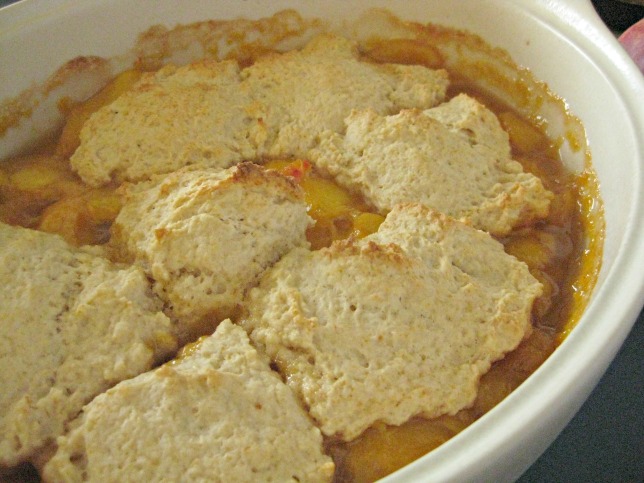
Fresh Peach Cobbler~ Erin's DC Kitchen

I love this dessert and it is my favorite way to use peaches, even more than pie. No offense to pie.

Fresh Peach Cobbler ~ Erin's DC Kitchen

This cobbler showcases the natural sweetness of the peach, which is complimented by the addition of warm cinnamon and almond extract. Go light on the extract, it can be a strong flavor and there is no need to overwhelm the peaches.

Fresh Peach Cobbler ~ Erin's DC Kitchen

I know making this dessert requires turning on the oven, which during summer, is counter intuitive. But! It is worth it. The light, spongy dumplings are so yummy, but then when you top it with French vanilla ice cream. Ohhhh my. It is just so creamy and sweet and fresh and fruity and tastes like a party in your mouth. Just try it. It’s simple and worth it!

Fresh Peach Cobbler

  • 1/2 cup sugar
  • 1 TBL cornstarch
  • 1/4 tsp cinnamon
  • scant 1/4 tsp almond extract
  • 5 cups sliced peaches
  • 1 tsp lime juice
  • 3/4 cup all purpose flour
  • 1/4 cup wheat flour
  • 1 TBL sugar
  • 1 1/2 tsp baking powder
  • 1/2 tsp salt
  • 3 TBL cold butter
  • 1/2 cup milk

Preheat oven to 400°. Peel and slice your peaches. (TIP: Cut an X into each peach, then plunge into boiling water for 60 seconds, this helps the skin slip off). In a large saucepan, combine peaches, 1/2 cup sugar, cinnamon, cornstarch, lime juice and almond extract. Stir until peaches are coated. Cook over medium-high heat, stirring frequently, until boiling, bubbling and thickening, about 5 minutes. Pour into an ungreased 2 qt. baking dish and set in the oven to keep warm while you make the dumpling dough.

In a medium bowl, combine the flours, baking powder, salt, and sugar.  Cut in the three TBL butter. I slice the three TBL into small pieces, then use my hands to rub the butter into the flour mixture. Do this until it resembles fine crumbs (finer than when making a pie crust). Stir in the milk, then dollop the dough over the cobbler. Bake for 25 to 30 minutes, or until dumplings are golden brown. Serve warm, with French vanilla ice cream!!

Enjoy!

– Erin

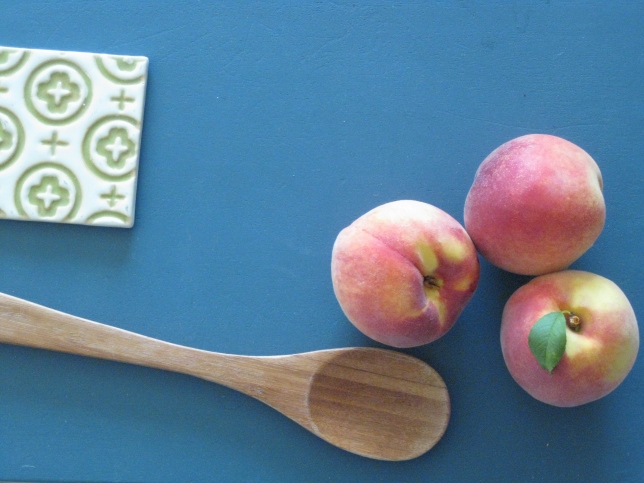
Just cause, isn't this a pretty picture?

Just cause, isn’t this a pretty picture?

Spiffed-Up Blueberry Muffins

Hi dear readers, it’s my last blueberry post.

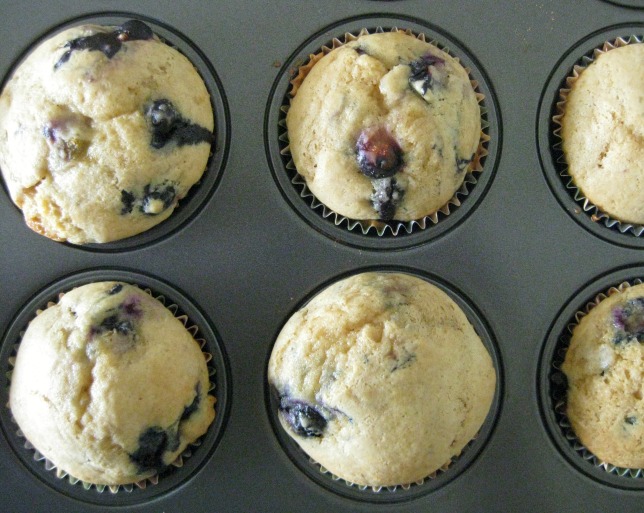
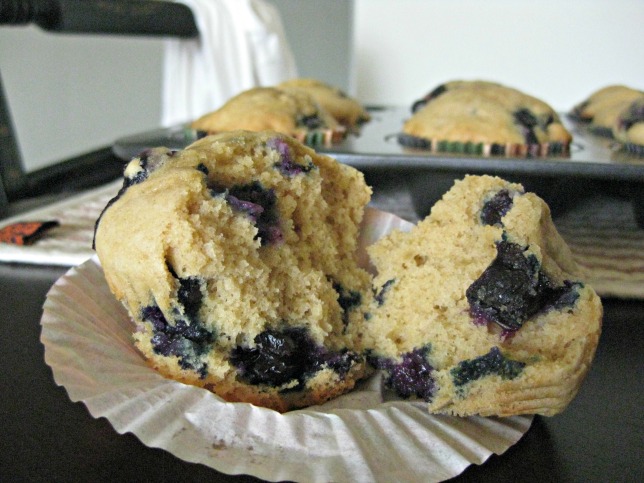
Whole-Grain Blueberry Muffins~ Erin's DC Kitchen

Spiffed-up blueberry muffins! So, what’s spiffed up about them?

Spiffed-Up Blueberry Muffins~ Erin's DC Kitchen

Well, the addition of whole grain flour of course. Why that? Read on friends.

My mom would crank out classic blueberry muffins every summer after we went picking. I always got excited about them, but didn’t love them (sorry mom).  I could not put my finger on the exact reason why I didn’t enjoy the muffins as much as I should have until I read a recipe from Nigel Slater. He pointed out that some muffins have a metallic taste which is due to the leavening agent. He recommended spelt flour to get rid of that flavor.

Whole-Grain Blueberry Muffins ~ Erin's DC Kitchen

I didn’t have any spelt on hand, so I improvised, natch. Whole wheat worked just as well, and yielded delicious, moist and chewy muffins. The whole wheat provides a nutty flavor that masks the leavening but compliments the gentle sweetness of the blueberries.

Spiffed-Up Blueberry Muffins ~ Erin's DC Kitchen

Spiffed-Up Blueberry Muffins (adapted from Nigel Slater)

  • 1 cup all purpose flour
  • 1 cup whole wheat flour
  • 1 1/2 tsp baking powder
  • 1/2 tsp baking soda
  • 1/2 tsp salt
  • 4 tbl soft butter
  • scant 2/3 cup sugar
  • 2 eggs
  • 1 tsp vanilla extract
  • scant 1/2 cup milk 
  • 1 1/2 cup blueberries

Preheat oven to 375°.  Line a muffin tin with 12 baking cups. Mix together the flours, baking powder and soda, and salt. In a separate bowl, cream the butter and sugar. Beat in the eggs, mix to combine, then the vanilla extract. Alternate adding in the flour mixture and the milk, until the ingredients are gently combined. Fold in blueberries. Divide the batter evenly among the 12 cups. Slater suggests sprinkling with oats and demerara sugar for visual effect, but I skipped it. 🙂

Bake for about 20 minutes, or until skewers come out mostly clean when muffins are pricked. Remove from baking tins and let cool on a rack.

Enjoy!

– Erin
Blueberry Batter Pudding

Let the blueberry posts continue!

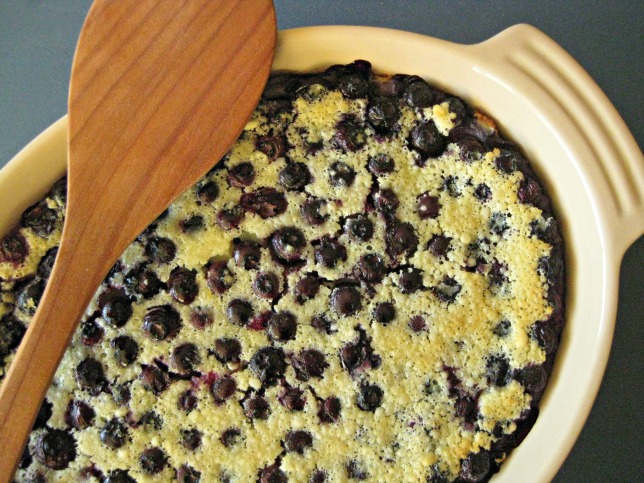
Blueberry Batter Pudding ~ Erin's DC Kitchen

Today’s recipe is from a cookbook by Nigel Slater called Ripe. My husband picked this up for me from the gift shop at Gettysburg. I don’t recall the story behind why it was carried in that bookstore, but I imagine it is because many of the recipes are somewhat ‘old timey’ in my opinion (fruit fools, slubs, puddings, old-fashioned cakes).

Ripe1

Not to sound like a walking advert for this cookbook, but I really enjoy it. There are some nice pictures which are mouthwatering to look at and there is a great array of recipes that are just fun to read. Yes, I’m a bit nerdy, and will read a cookbook like a novel.

The book is organized according to chapters by “fruit”. So, if you have a load of blueberries like I did, you can read the blueberry chapter and there is plenty of inspiration right there in one spot.

Alright, enough on that. Let’s move onto the pudding! This is not a Jell-O style pudding, it is a baked British pudding.

Blueberry Batter Pudding~ Erin's DC Kitchen

Once you’ve whipped up the incredibly easy batter, pour it over the blueberries, and they float to the top of the dish and help form the delicate golden crust you see. Hiding just underneath is a warm, quivering custard pudding.

Blueberry Batter Pudding~ Erin's DC Kitchen

I really loved this dessert, topped with some lightly sweetened and barely whipped cream. (I mean barely holding its shape so it gets a bit melty when it hits the warm pudding). Please, try it for yourself. I bet peaches would be lovely with it too.

Blueberry Batter Pudding

  • 4 eggs
  • scant 2/3 cup all purpose flour
  • heaping 1/3 cup superfine sugar (I put white sugar through a food processor)
  • 1 cup heavy cream
  • 1 cup 2% milk
  • 2 cups blueberries
  • confectioners sugar and whipped cream, to serve

Preheat oven to 400°. Grease an ovenproof 2 quart dish (about 10 in in diameter) with butter or shortening.  Pulse the eggs, flour, sugar, cream and milk together in a food processor. Pour the blueberries into the greased dish, then pour the whipped batter over the berries. Bake for about 40 minutes or until batter is golden, lightly risen and just barely set (firm to the touch, but a bit wobbly). Remove from oven and let cool slightly. Whip your cream, dust with confectioners sugar and serve warm.

Enjoy!

– Erin

*Note: I tweaked this slightly from Nigel’s recipe, this isn’t an exact reprint.

Blueberry Preserves

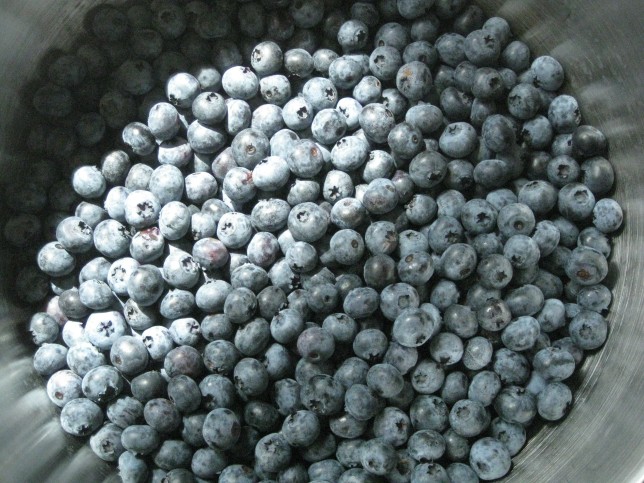
The husband and I went blueberry picking last weekend at Butler’s Orchard and hauled in a little over 12 lbs!

Fresh picked blueberries ~ Erins' DC Kitchen

So you know what that means? JAM! And more blueberry posts 🙂

Oddly enough, this is the first time I’ve made blueberry jam on my own versus just helping (loosely) my Mom make hers. (Thanks for peaking my interest in canning!)

Homemade Blueberry Jam~ Erin's DC Kitchen

So pretty isn’t it?

Homemade Blueberry Jam~ Erin's DC Kitchen

Right after I finished this batch, I had to turn around and leave for a business trip to Newport, RI and didn’t get to try any of it until this morning! It’s was so good, not overly sweet because I opted for a lower sugar recipe, and bursting with blueberry pieces.

Here is the recipe!

Erin’s Blueberry Jam

  • 5 cups crushed blueberries (it took around 9 cups of whole berries to get to 5 crushed)
  • juice of 1 lemon
  • 4 cups sugar (up to 4 1/2 cups)
  • 1/2 cup honey
  • 6 tablespoons Ball powder pectin (or 1 box pectin, 49 to 57 g)

Makes about 7 to 8 eight ounce (250 ml) jars

Prepare boiling water canner, jars and lids. In a very large pot combine the berries and lemon juice. Whisk in pectin until dissolved. Bring to a boil over high heat, stirring frequently. Add all the sugar and honey at once, then return to a full boil and cook for 1 minute. Remove from heat and skim off foam. Ladle into prepared jars and leave 1/4 inch headspace at the top. Place on lids and bands, boil in the canner for 10 minutes. Remove from water and let stand 24 hours, during which time the lids should vacuum seal.

Enjoy!

– Erin

Need a more comprehensive breakdown of how to make jams? Read my step-by-step, soup to nuts guide to strawberry jam.

Buttermilk Blueberry Pie Ice Cream

Hi dear readers!

Hope everyone has been enjoying the summer and had an excellent 4th of July.

I went up to the cottage, per usual, and had an amazingly relaxing time with family and much good food (remember doughboys?) You can find more of my 4th of July cottage foods here and here and here.

This year I borrowed my Aunt’s ice cream maker to whip up a recipe I submitted to the Hudsonville ice cream company’s Pure Michigan flavor contest. Sadly, I didn’t win. BUT- my family thought the ice cream was delicious and totally should have won (ok, my emphasis added).

So, what is it? Creamy buttermilk ice cream with lots of lemon zest, swirled with Michigan blueberry pie filling and dotted with cinnamon-sugar pie crust pieces.

Yup, drool.

Buttermilk Blueberry Pie Ice Cream ~ Erin's DC Kitchen

Buttermilk Blueberry Pie Ice Cream ~ Erin's DC Kitchen

So, want to make it??

_MS_8260

Buttermilk Ice Cream~ Erin's DC Kitchen

_MS_8293

To swirl in pie crust and pie filling, transfer to a large bowl and fold gently with a spatula

Ta-Da!

Ta-Da!

(Special thanks to my photographer brother, Jeffrey Smith, for the awesome photos!)

Well, I kinda failed to write the recipe down 😦 and time has passed and most of it has left my mind. But I’ll sketch it out below, the parts I remember, and then you can fill in the blanks by comparing other recipes or using your best judgement.

Buttermilk Blueberry Pie Ice Cream

  • 6 to 8 cups buttermilk
  • 2 cups heavy cream
  • 6 egg yolks
  • 1 lemon, juice and zest
  • 1 1/2 cup sugar (really don’t remember if this is right)
  • pinch of salt

For the blueberry pie filling

  • 1 heaping cup blueberries
  • 1/2 cup sugar
  • dash of water
  • 1/4 tsp or so cinnamon
  • 1 tsp vanilla
  • single pie crust, sprinkled with cinnamon and sugar, baked and broken into pieces

For the pie filling: Lightly smash berries and combine with all over ingredients in a small saucepan over medium heat. Heat until boiling, stirring often, then reduce to a simmer and let cook for 5 minutes. Mixture will naturally thicken. Remove from heat and let cool completely.

For the ice cream: Combine the buttermilk, cream, salt, and lemon juice and zest in a large saucepan and heat until just bubbly but not scalded. Stir in sugar and continue stirring until heated through and sugar is dissolved. Temper the egg yolks with a bit of the warm cream mixture, then quickly whisk in the rest of the cream mixture. Add to a large ice cream maker and freeze according to manufacture instructions.

Once ice cream is frozen, but still a little soft and creamy, remove from maker into a large bowl. Gently fold the broken pie crust pieces into the ice cream. Next, dollop the pie filling across the top of the ice cream and gently fold that in, turning only 2 or 3 times max (you want swirls, not to fully mix the berries in, resist temptation to overstir!). Freeze for another 2 hours, of until fully set.

Enjoy!

-Erin

Pink Lemonade Icebox Bars

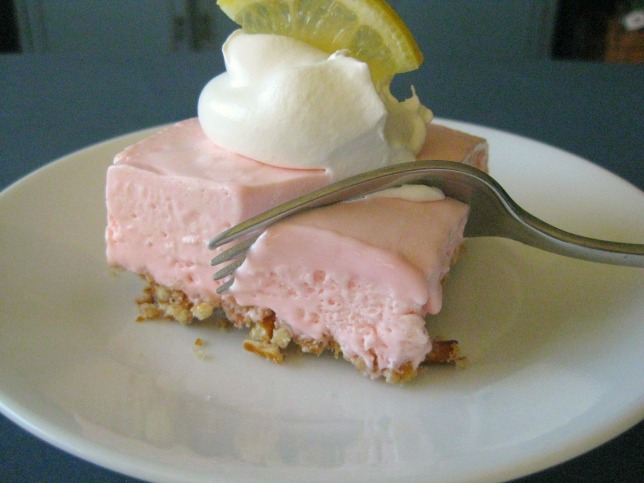
Lemonade Icebox Bars ~ Erin's DC Kitchen

Happy summer my dear readers! June 21st marked the first ‘official’ day of summer on the calender, but we’ve been going full summer down here in DC for a few weeks. Sundresses!

I’ve been wanting to make an icebox-style dessert since I first read about it in Southern Living magazine (I believe). So, when I was asked to bring a dessert to a friend’s BBQ this past weekend, I made this tangy, sweet, citrusy and chilly little number.

Pink Lemonade Icebox Bars ~ Erin's DC Kitchen

It could not be easier to whip this up either. Cool Whip, lemonade mix and sweetened condensed milk are the key ingredients. Plus- the crust! Oh the crust.

Pink Lemonade Icebox Bars ~ Erin's DC Kitchen

I crushed pretzels and mixed them with butter and sugar to make this sweet ‘n’ salty crust– amazeballs!

My tip for this recipe is to make sure you have enough time to fully freeze the bars. I had only refrigerated the bars for a couple hours before initially serving them at the party and the texture was not right- it was almost pudding-like and didn’t hold shape. However, once fully frozen, the texture became smooth and silky, and held a perfect bar shape once cut.

Pink Lemonade Icebox Bars

  • 1 8 oz carton Cool Whip, thawed
  • 1 12 oz can Minute Maid pink lemonade mix (from concentrate), thawed
  • 1 14 oz can sweetened condensed milk
  • 1 oz block cream cheese, softened
  • 5 drops pink food coloring
  • 1 stick butter, melted
  • 2 cups well crushed pretzels
  • 3 tablespoons white sugar

For the crust: Preheat oven to 375°. Crush pretzels in a food processor until mainly crumbs with some a few small pieces. Toss in a large bowl with white sugar. Melt butter and drizzle over the crumbs, toss to coat. Press into the bottom of a greased 9×13 baking pan and bake for 10 minutes, just until set. Remove from oven and let cool.

For the bars: With an electric mixer, beat the cream cheese and sweetened condensed milk until creamy and well combined. Mix in the pink lemonade mix and the food coloring, beat until combined. Gently fold in the Cool Whip and mix until incorporated fully. Pour into the cooled crust, cover and freeze until set, at minimum 2 hours. (I did mine overnight).

Enjoy!

– Erin

Want more lemonade goodness? Check out my Strawberry Lemonade Cookie Bars!